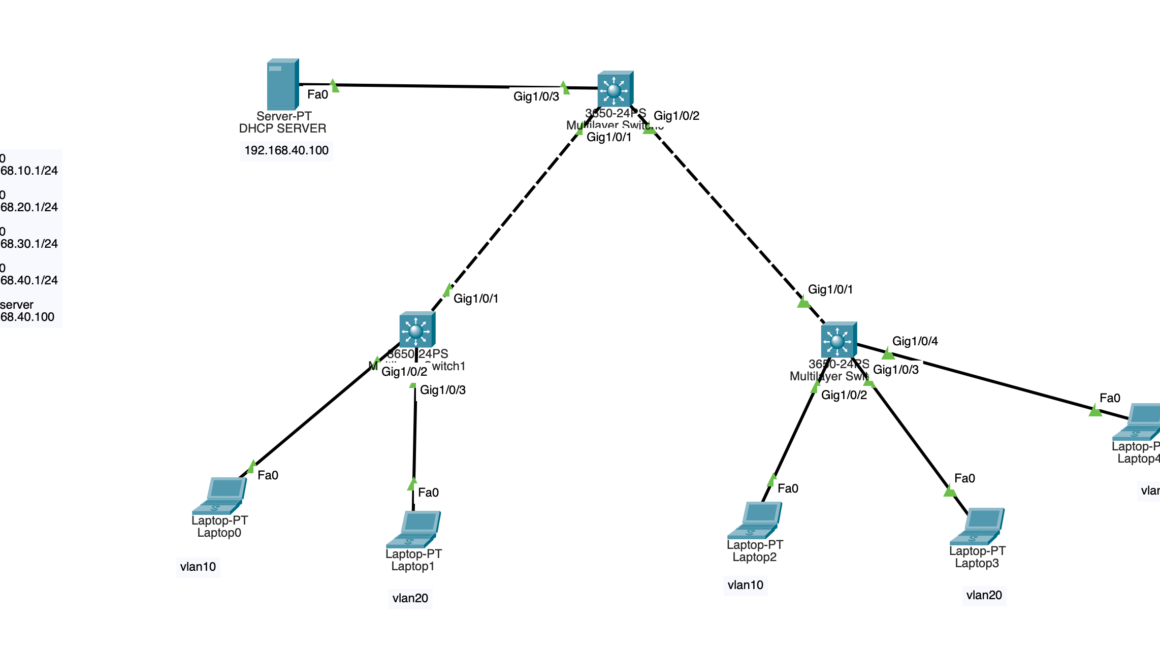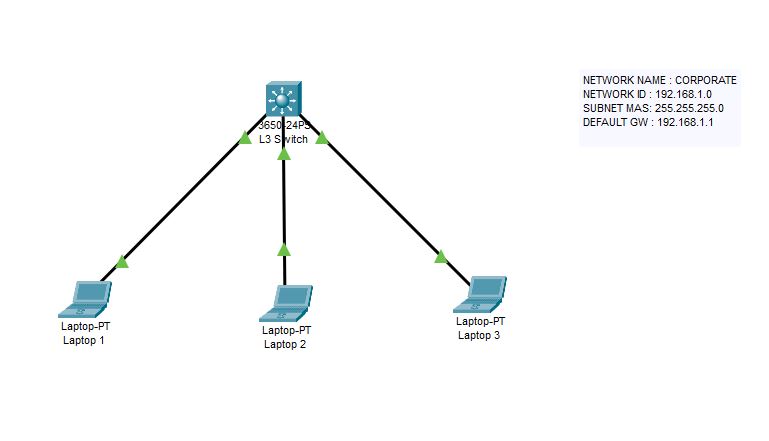
How to configure DHCP service on Cisco Layer 3 switch?
Let’s assume that we have an imaginary network called CORPORATE. This network is 192.168.1.0 and the subnet mask is 255.255.255.0 (/24). At this example, we have 3 client notebook which get IP address from our internal DHCP server which is configured in Cisco switch. First we need to define the network ID and network subnet mask. Then we will define our DNS servers and default gateway. Then it should work properly.
Switch>en

Switch#configure terminal
Enter configuration commands, one per line.  End with CNTL/Z.
Switch(config)#ip dhcp pool CORPORATE
Switch(dhcp-config)#network 192.168.1.0 255.255.255.0
Switch(dhcp-config)#default-router 192.168.1.1
Switch(dhcp-config)#dns-server 192.168.1.10
Switch(dhcp-config)#exit
Switch(config)#interface vlan 1
Switch(config-if)#ip address 192.168.1.1 255.255.255.0
Switch(config-if)#no shutdown

Switch(config-if)#
%LINK-5-CHANGED: Interface Vlan1, changed state to up

%LINEPROTO-5-UPDOWN: Line protocol on Interface Vlan1, changed state to up

Switch(config-if)#exit
Switch(config)#exit
Switch#
%SYS-5-CONFIG_I: Configured from console by console

Switch#copy running
Switch#copy running-config start
Switch#copy running-config startup-config
Destination filename [startup-config]?
Building configuration...
[OK]
Switch#
If your DHCP service is not working despite of defining all these command, then you probably deactivated your DHCP service before. No worries, it is an easy task to enable DHCP on Cisco switch. With the below command, your DHCP will distribute IP address.
Switch#
Switch#configure terminal
Enter configuration commands, one per line.  End with CNTL/Z.
Switch(config)#service dhcp
Switch(config)#exit
Switch#
IMPORTANT : Please keep in mind that your dhcp service is active by default.