What is DMZ (Demilitarized Zone)?
A DMZ (Demilitarized Zone) in computer networking refers to a physical or logical subnetwork that contains and exposes an organization’s external-facing services to an untrusted network, usually the internet. The purpose of a DMZ is to add an additional layer of security to an organization’s local area network (LAN); an external attacker only has access to equipment in the DMZ, rather than any other part of the network.
Key aspects of a DMZ include:
- Isolation: Systems within the DMZ are isolated from the internal network. This is typically achieved using firewalls to create a boundary between the internal network and the DMZ.
- Access Control: Strict access controls are implemented, usually through firewalls, to manage the traffic that can flow between the DMZ, the internal network, and the external internet. Only necessary communication is permitted.
- Exposure: Services that need to be accessible from the external network, such as web servers, mail servers, and FTP servers, are placed in the DMZ. This ensures that these services are exposed to the internet while keeping the internal network protected.
- Security: If a service in the DMZ is compromised, the internal network remains protected due to the isolation provided by the DMZ setup.
Common Use Cases
- Web Hosting: Hosting a website that needs to be accessed by the general public.
- Email Servers: Allowing external email to be received while protecting the internal email system.
- DNS Servers: Providing DNS resolution services to external clients without exposing internal DNS servers.
Firewall Initial configuration CLI
FortiGate-VM64-KVM login: admin
Password:
You are forced to change your password, please input a new password.
New Password:*****
Confirm Password:*****
Welcome !

FortiGate-VM64-KVM # config system interface

FortiGate-VM64-KVM (interface) # edit port1

FortiGate-VM64-KVM (port1) # set alias WAN

FortiGate-VM64-KVM (port1) # set role wan

FortiGate-VM64-KVM (port1) # set mode static

FortiGate-VM64-KVM (port1) # set ip 192.168.178.200 255.255.255.0

FortiGate-VM64-KVM (port1) # set allowaccess ssh ping http https telnet fgfm

FortiGate-VM64-KVM (port1) # next

FortiGate-VM64-KVM (interface) # edit port2

FortiGate-VM64-KVM (port2) # set alias LAN

FortiGate-VM64-KVM (port2) # set role lan

FortiGate-VM64-KVM (port2) # set mode static

FortiGate-VM64-KVM (port2) # set ip 192.168.200.1 255.255.255.0

FortiGate-VM64-KVM (port2) # set allowaccess ssh ping telnet fgfm http https

FortiGate-VM64-KVM (port2) # next

FortiGate-VM64-KVM (interface) # edit port3

FortiGate-VM64-KVM (port3) # set alias

incomplete command in the end
Command fail. Return code -160

FortiGate-VM64-KVM (port3) # set alias DMZ

FortiGate-VM64-KVM (port3) # set role dmz

FortiGate-VM64-KVM (port3) # set mode static

FortiGate-VM64-KVM (port3) # set ip 192.168.100.1 255.255.255.0

FortiGate-VM64-KVM (port3) # end

FortiGate-VM64-KVM #
Configuration Steps
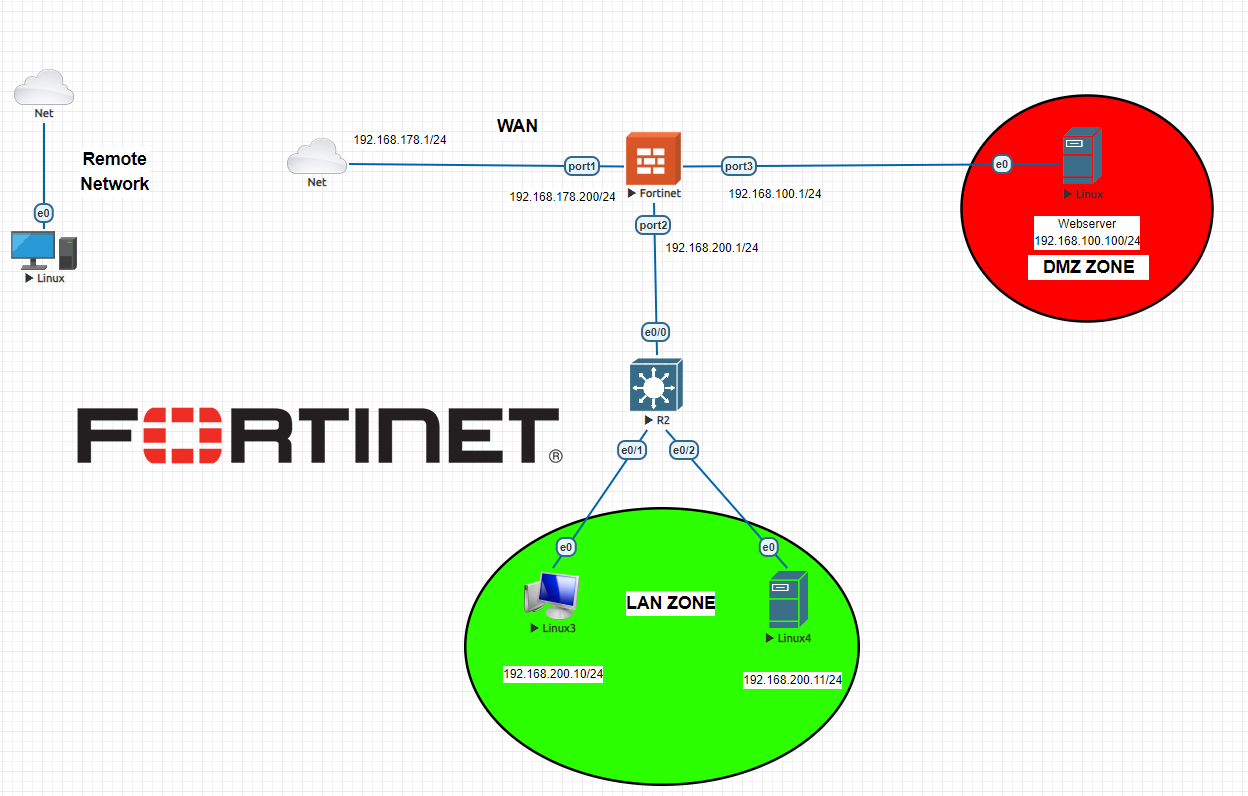
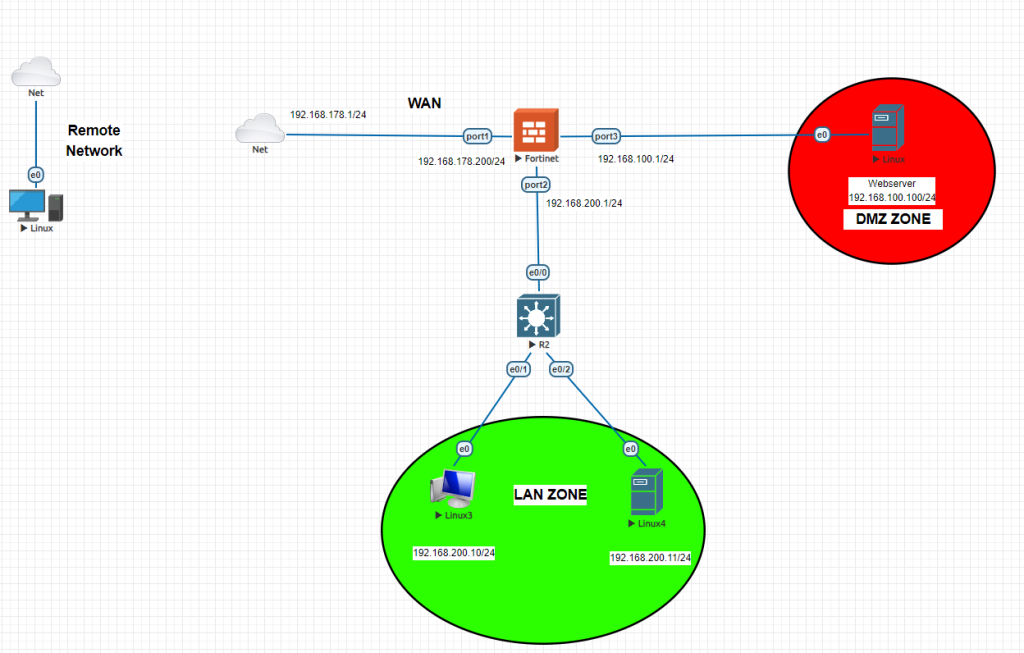
1-) Initial configuration of the firewall
2-)Interface configurations and ipv4 basic policies
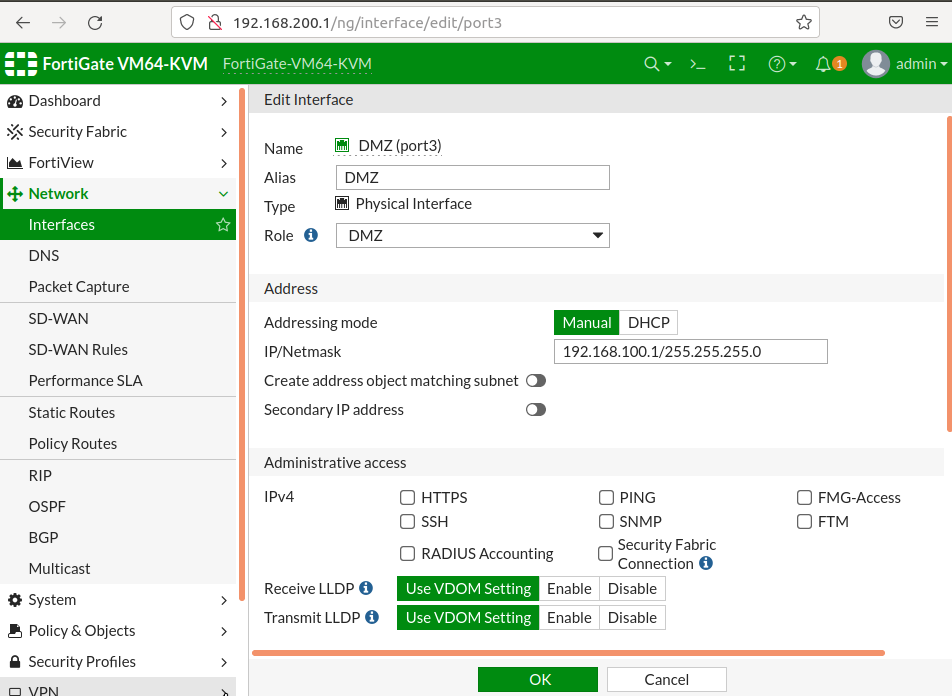
3-)DMZ interface configuration (no administrative access)
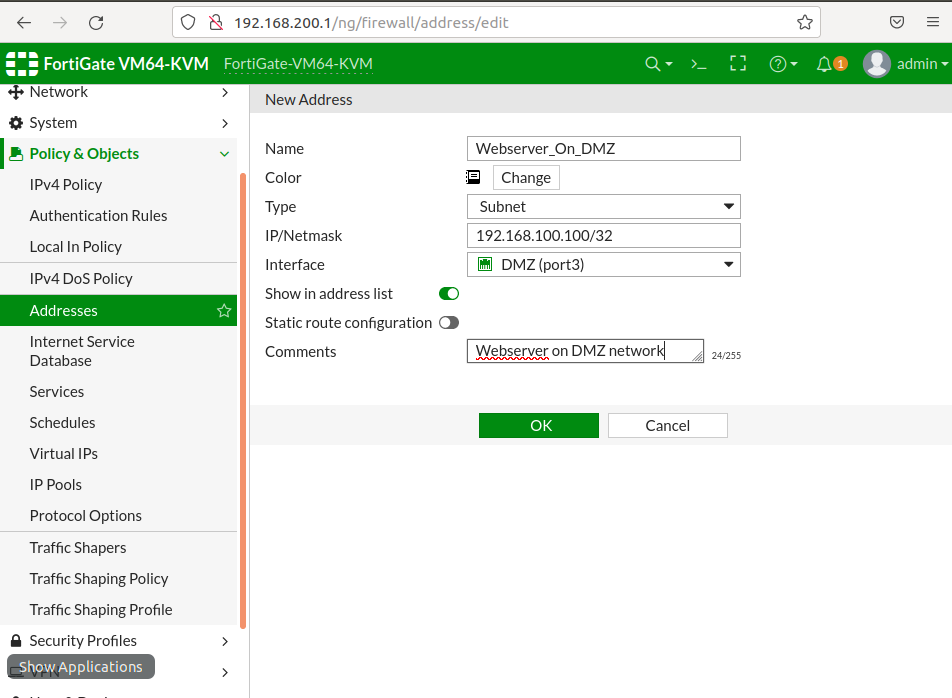
4-)Adding webserver’s IP address to Addresses as Subnet via /32 CIDR ending and DMZ as interface
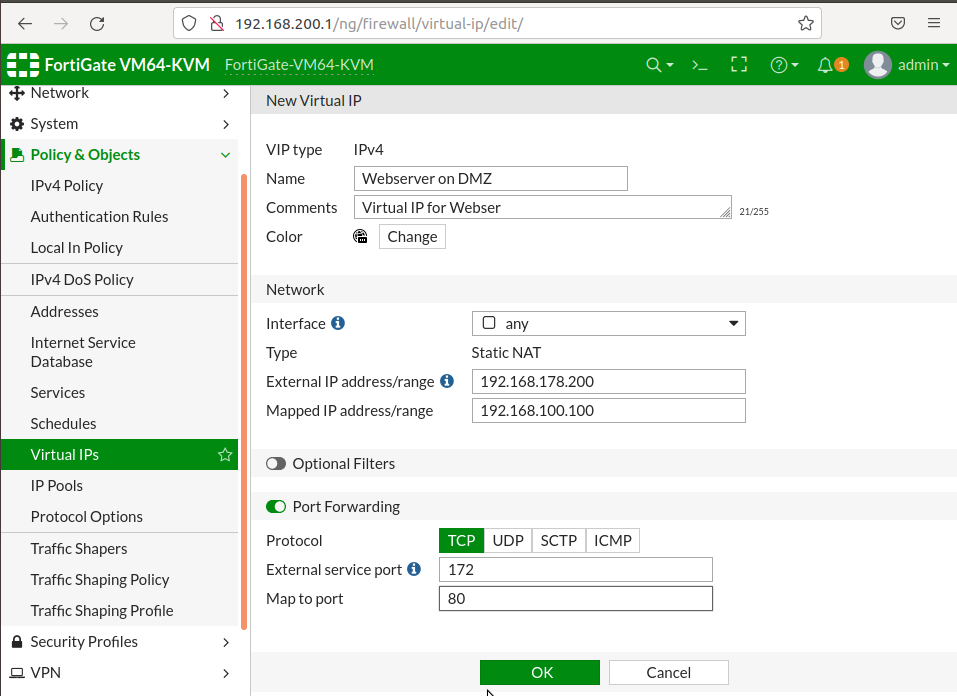
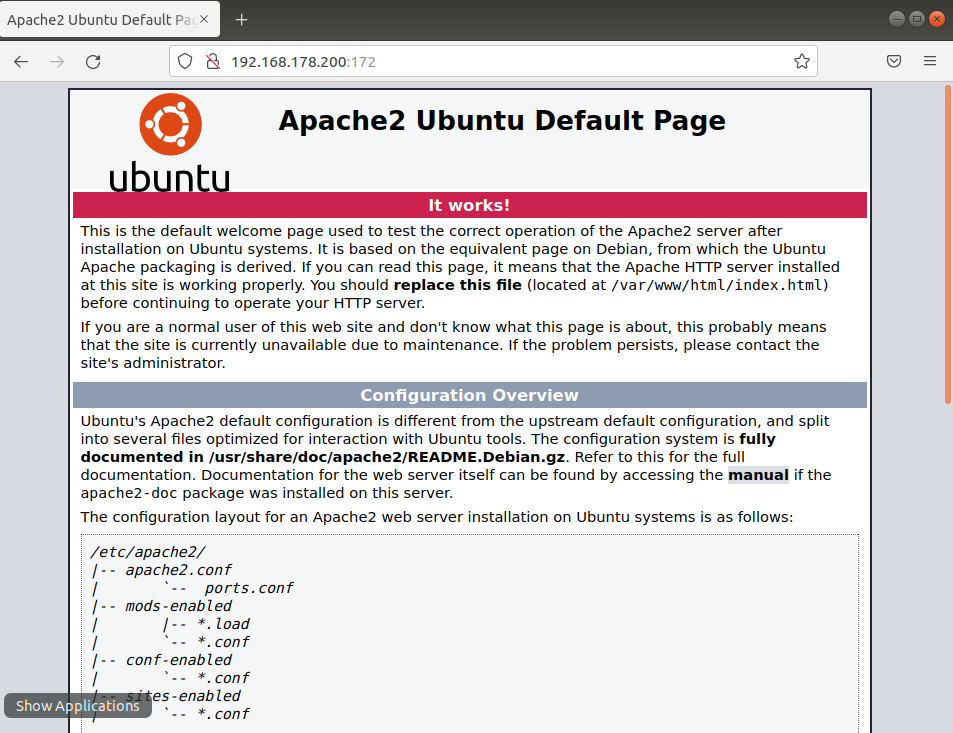
5-)Configuring Virtual IP to map WAN to DMZ access. In this example we mapped 192.168.178.200:172 to 192.168.100.100:80 so once someone wants to access our webserver; outside address and port is 192.168.178.200:172 . As we are using 443 and 80 for administrative access we have chosen this specific port. If you change your administrative access port to something else then you can directly define 443 for webserver.
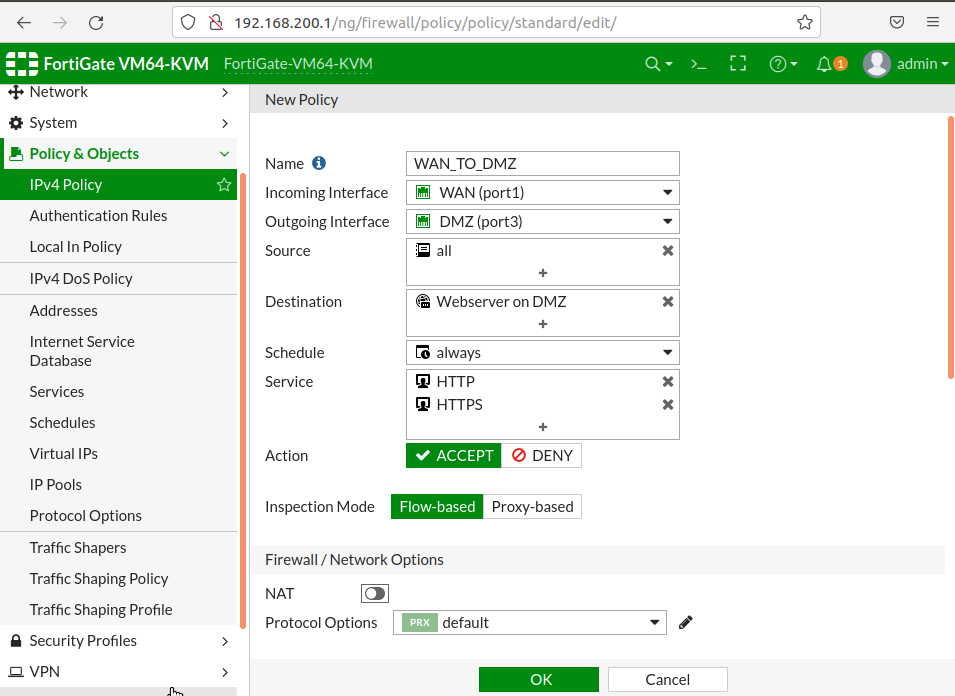
6-)Configuring DMZ ipv4 policies
7-)Access from remote network via 192.168.178.200:172 > 192.168.100.100:80
Please feel free to contact me if you have any questions.
Happy networking 🙂