Cisco ASA (Adaptive Security Appliance) is a security device that provides firewall, VPN, and other security services for networks. It can operate in multiple modes, including Routed Mode and Transparent Mode. Let’s focus on Cisco ASA Transparent Mode.
In Transparent Mode, the Cisco ASA firewall is inserted into a network without requiring any IP address changes or routing configuration on the devices in the network. Instead of routing traffic between interfaces, as it does in Routed Mode, the ASA works at Layer 2, essentially acting as a bridge. Here are some key characteristics of Cisco ASA Transparent Mode:
- Layer 2 Bridging: In Transparent Mode, the ASA firewall operates at Layer 2, which means it doesn’t have IP addresses assigned to its interfaces, and it doesn’t route traffic. Instead, it bridges traffic between two or more interfaces, allowing traffic to pass through while inspecting it for security violations.
- No IP Address Changes: Devices on either side of the ASA do not need to change their IP addresses, and the ASA does not participate in the IP routing process. This can be useful in situations where you want to add a firewall to an existing network without changing the network topology.
- Stealthy Deployment: Transparent Mode is sometimes referred to as “stealth mode” because it doesn’t alter the network’s IP address scheme, making the firewall less conspicuous in the network.
- Layer 2 ACLs: In Transparent Mode, security policies are applied using Layer 2 Access Control Lists (ACLs) rather than Layer 3/4 ACLs, as the ASA does not perform routing. These ACLs can be used to filter or inspect traffic based on MAC addresses and other Layer 2 criteria.
- ARP Handling: The ASA in Transparent Mode handles ARP (Address Resolution Protocol) requests and replies to maintain the transparency of the network, allowing devices to communicate as if the ASA were not present.
- Spanning-Tree Protocol (STP): Transparent Mode ASA devices can participate in STP (Spanning-Tree Protocol) to prevent Layer 2 loops and ensure network stability.
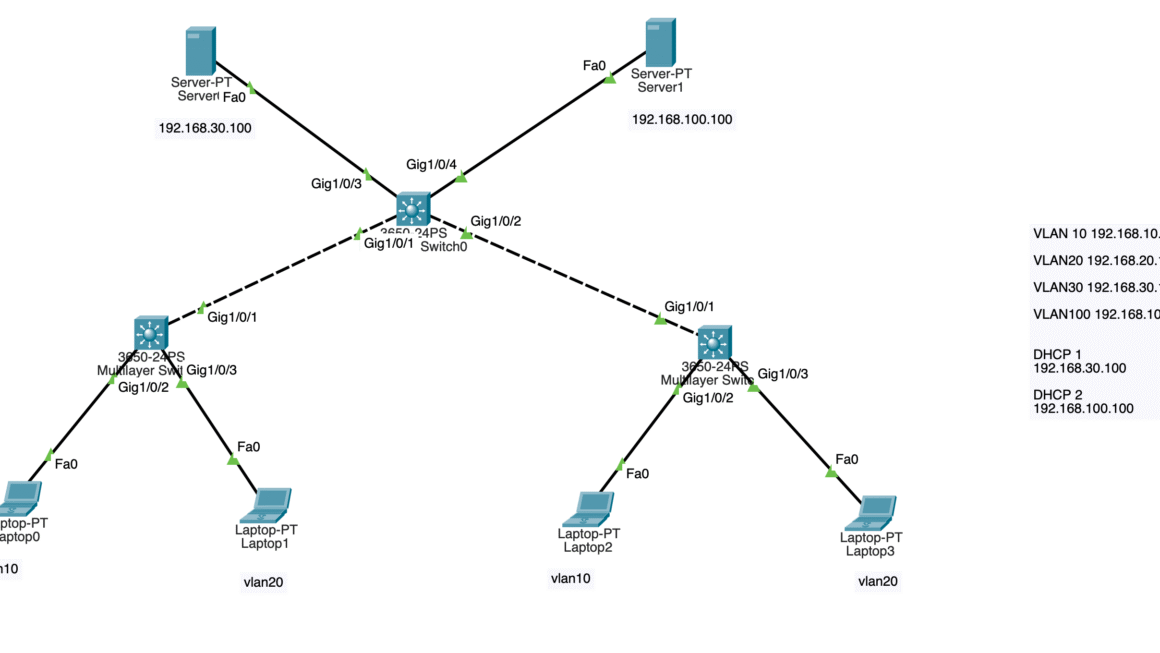
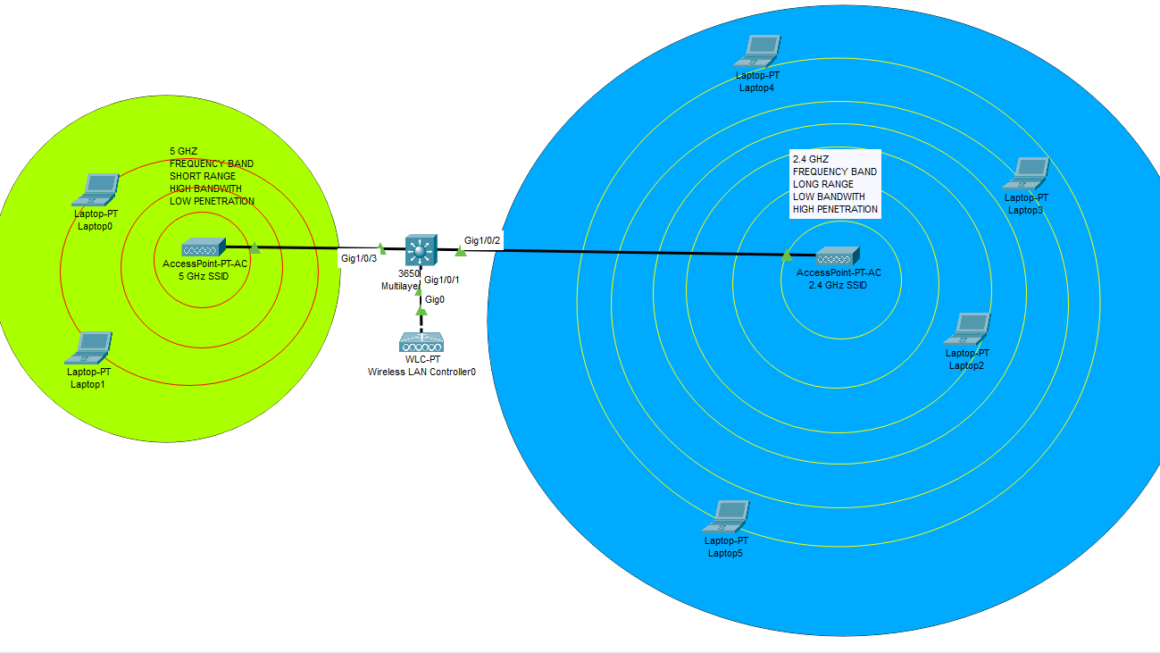
On this topology we will use 2 L3 Cisco switches, 1 Cisco ASA Firewall and 4 client machines. We will create our VLANs on R2 Switch and assign the ports as access mode. Then we will jump into Cisco ASA configuration. One of the most important point is that, we will change firewall mode from router to transparent. We will use the same subnet on inside interface and outside interface. Both will be the same network. Transparent mode is most likely called as BUMP-IN-THE-WIRE. Traffic will be roaming on Layer-2. And on ASA, traffic will flow from most secure point to least secure point. Then once we complete the configuration, we will set some ACL rules to decide which nodes will be able to communicate. Also one of the most important thing at transparent mode, you should set an ACL for DHCP packages. Your DHCP server should be reachable from clients by duplex (two-way) communication. Lets start.
R2 SWITCH (VLAN SVIs)
do not forget to enable 'ip routing' command for intervlan communication
Switch>en
Switch#sh run
Building configuration...

Current configuration : 1012 bytes
!
! Last configuration change at 21:05:29 UTC Thu Oct 26 2023
!
version 15.1
service timestamps debug datetime msec
service timestamps log datetime msec
no service password-encryption
service compress-config
!
hostname Switch
!
boot-start-marker
boot-end-marker
!
!
no aaa new-model
!
ip cef
!
!
no ipv6 cef
ipv6 multicast rpf use-bgp
!
!
spanning-tree mode pvst
spanning-tree extend system-id
!
vlan internal allocation policy ascending
!
!
interface Ethernet0/0
 switchport access vlan 10
 switchport mode access
 duplex auto
!
interface Ethernet0/1
 switchport access vlan 20
 switchport mode access
 duplex auto
!
interface Ethernet0/2
 switchport access vlan 10  (This will be connected to Cisco ASA outside interface)
 switchport mode access
 duplex auto
!
interface Ethernet0/3
 duplex auto
!
interface Vlan10
 ip address 192.168.10.1 255.255.255.0
!
interface Vlan20
 ip address 192.168.20.1 255.255.255.0
!
no ip http server
!
control-plane
!
line con 0
 logging synchronous
line aux 0
line vty 0 4
 login
!
end
Cisco ASA Configuration
do not forget to change the firewall mode on config mode by ‘firewall transparent’ then ‘reload’
ciscoasa# sh run
: Saved
:
: Serial Number: 9A8FU1GPATC
: Hardware: ASAv, 2048 MB RAM, CPU Pentium II 2994 MHz
:
ASA Version 9.4(1)
!
firewall transparent
hostname ciscoasa
enable password 9Ry2YjIyt3RRXUe24 encrypted
names
!
interface GigabitEthernet0/0
nameif inside
bridge-group 1
security-level 100
!
interface GigabitEthernet0/1
nameif outside
bridge-group 1
security-level 0
!
interface GigabitEthernet0/2
shutdown
no nameif
no security-level
!
interface GigabitEthernet0/3
shutdown
no nameif
no security-level
!
interface GigabitEthernet0/4
shutdown
no nameif
no security-level
!
interface GigabitEthernet0/5
shutdown
no nameif
no security-level
!
interface GigabitEthernet0/6
shutdown
no nameif
no security-level
!
interface Management0/0
management-only
shutdown
no nameif
no security-level
!
interface BVI1
(here we need to set a bridge group as our 2 interfaces are from the same subnet. And we will define this BVI to both interface. To set a BVI go to config mode then ‘bridge-group 1’ then ‘ip address x.x.x.x subnetmask’)
ip address 192.168.10.201 255.255.255.0
!
ftp mode passive
pager lines 23
logging enable
mtu inside 1500
mtu outside 1500
no failover
no monitor-interface service-module
icmp unreachable rate-limit 1 burst-size 1
no asdm history enable
arp timeout 14400
no arp permit-nonconnected
timeout xlate 3:00:00
timeout pat-xlate 0:00:30
timeout conn 1:00:00 half-closed 0:10:00 udp 0:02:00 icmp 0:00:02
timeout sunrpc 0:10:00 h323 0:05:00 h225 1:00:00 mgcp 0:05:00 mgcp-pat 0:05:00
timeout sip 0:30:00 sip_media 0:02:00 sip-invite 0:03:00 sip-disconnect 0:02:00
timeout sip-provisional-media 0:02:00 uauth 0:05:00 absolute
timeout tcp-proxy-reassembly 0:01:00
timeout floating-conn 0:00:00
user-identity default-domain LOCAL
no snmp-server location
no snmp-server contact
crypto ipsec security-association pmtu-aging infinite
crypto ca trustpoint _SmartCallHome_ServerCA
no validation-usage
crl configure
crypto ca trustpool policy
telnet timeout 5
no ssh stricthostkeycheck
ssh timeout 5
ssh key-exchange group dh-group1-sha1
console timeout 0
threat-detection basic-threat
threat-detection statistics access-list
no threat-detection statistics tcp-intercept
dynamic-access-policy-record DfltAccessPolicy
!
class-map icmp-class
match default-inspection-traffic
class-map inspection_default
match default-inspection-traffic
(You need to enable ICMP policy to be able to ping outside)
!
!
policy-map type inspect dns preset_dns_map
parameters
message-length maximum client auto
message-length maximum 512
policy-map icmp_policy
class icmp-class
inspect icmp
policy-map global_policy
class inspection_default
inspect rtsp
inspect sunrpc
inspect xdmcp
inspect netbios
inspect tftp
inspect ip-options
inspect dns preset_dns_map
inspect ftp
inspect h323 h225
inspect h323 ras
inspect rsh
inspect esmtp
inspect sqlnet
inspect sip
inspect skinny
inspect icmp
!
service-policy global_policy global
prompt hostname context
no call-home reporting anonymous
call-home
profile License
destination address http https://tools.cisco.com/its/service/oddce/services/DDCEService
destination transport-method http
Cryptochecksum:61c308a772f96a497ee12ca59b01970b
: end
ciscoasa#
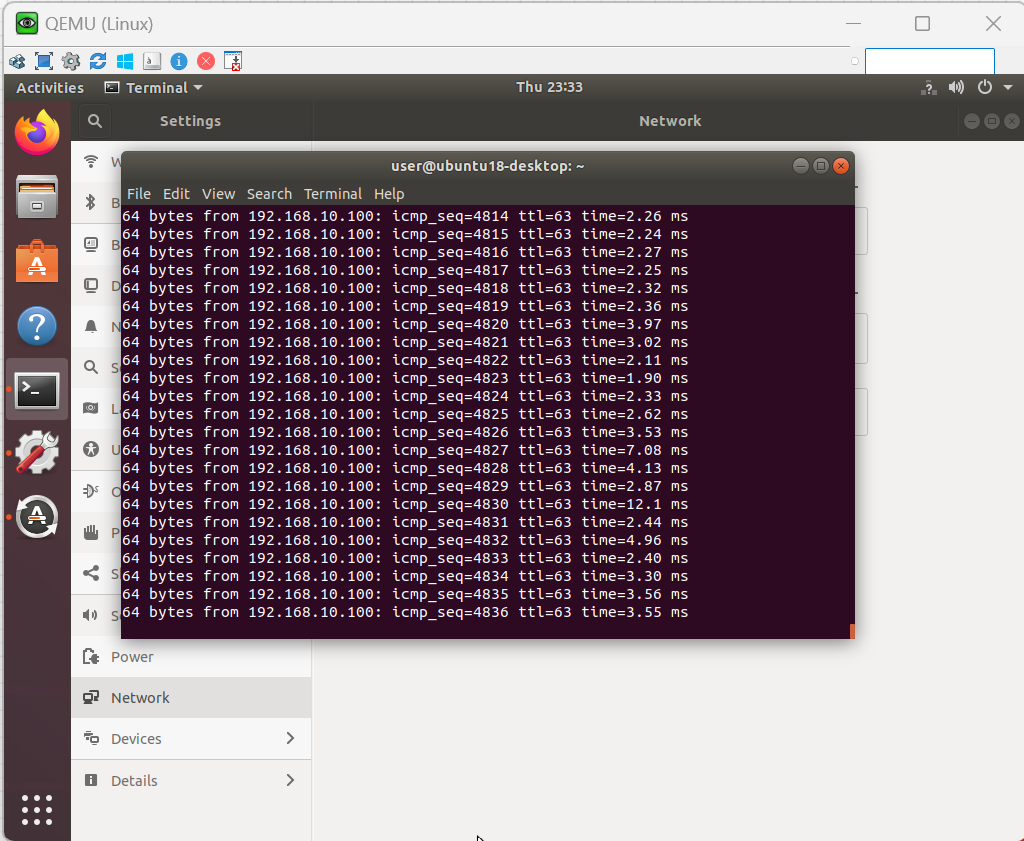
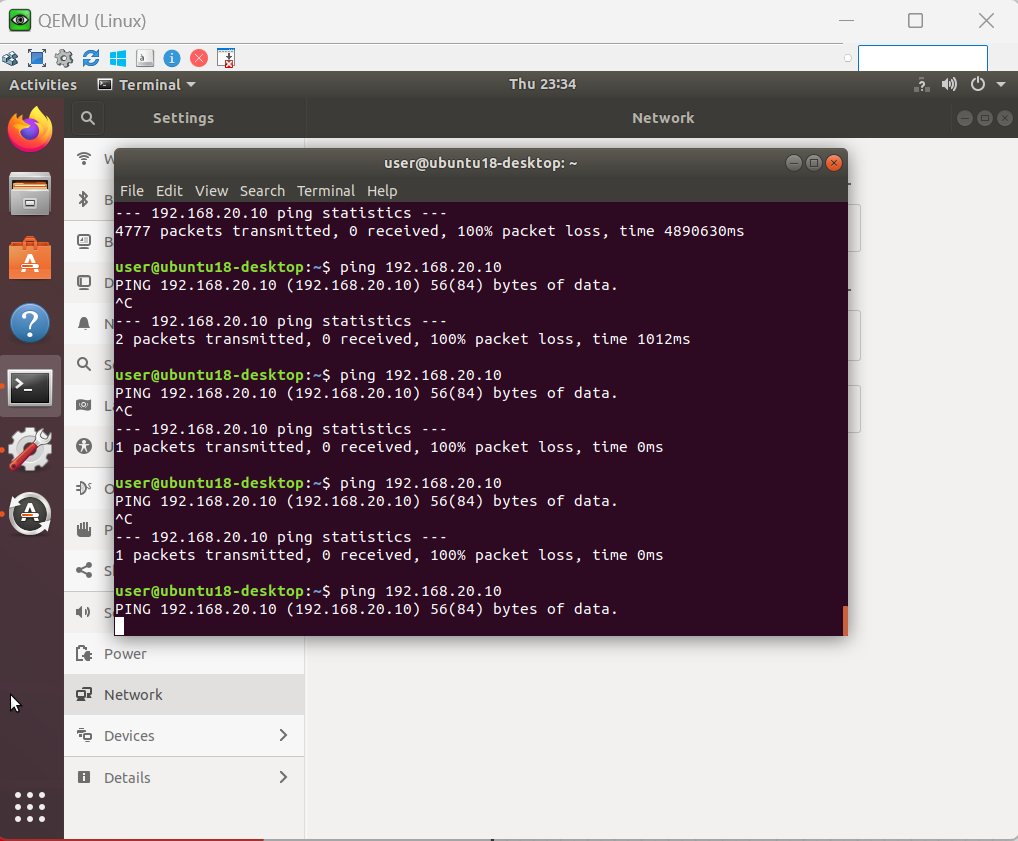
Now configuration is done and without any settings you can set static IPs on clients and try to ping from inside interface to outside interface. But you cannot ping from outside to inside as security-level is lower than inside interface. R3 switch will be acting like a dumb switch and will enable access withing the same subnet without any config.
Afterwards you can write detailed ACL rules to set communication rules between interfaces.
Also do not forget to add your DHCP server address for DORA packages. Communication should be duplex.
Happy networking 🙂